 on Ribbon Tab page "Home" and then move the mouse to the page. You will see that the mouse pointer changes into a cross
  .
. Positioning stamps - Manually
Stamps can be added to a page in two ways. The first way is the manual method which will be described in this paragraph. In case you want to add more stamps of the same size, this method will be very labour-intensive. Therefore Stamp Album Studio has the Layout Wizard which enables you to position and align stamp in a very efficient manner. The Layout Wizard will be described in the next paragraph.
With Stamp Album Studio you can draw different kind of stamps:
Because the rectangular stamp is the most common shape of stamps in use, only this shape will be described here. Other shapes of stamps can be drawn analogously.
You can draw a rectangular stamp on a page by pressing the button Stamp Rectangle  on Ribbon Tab page "Home" and then move the mouse to the page. You will see that the mouse pointer changes into a cross
  .
.
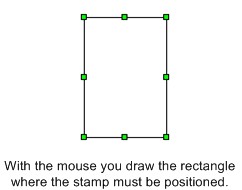
Press the left mouse button when the middle of the cross is in the right position. You can read the position in the statusbar. When you keep the left mouse button down and move the mouse the stamp will be drawn between the first point where you clicked the left mouse button and the current mouse position.

When the stamp has the right size you release the left mouse button. The stamp has now been drawn. If you want you can now change the properties of the stamp or perform other operations on the stamp.
Now delete the stamp we just have drawn with the DEL button or through the right mouse button menu (context menu) and then the option Delete  . In the next paragraph we will add stamps with the Layout Wizard.
Note:
If you want to add more rectangular stamps, you can keep SHIFT button down while pressing the Stamp Rectangle button. The button will then stay down, until you press another button on the toolbar "Drawing".
Copyright © 2015, Arvades